


Do you wish to learn more about creating your Trust Wallet and would like someone to guide you through the process?
Earlier this week, I wrote a blog about creating a wallet on MetaMask. In this blog, you'll learn:
- Installing the Trust Wallet application.
- Setting up a Trust Wallet.
- Accessing your wallet account.
- Learning about the user interface.
Also, I'll explain to beginners what a Trust Wallet is.
What is Trust Wallet?
Trust Wallet is a decentralized application used for sending, receiving, and buying cryptocurrency. Moreover, it is highly secure since it is decentralized, and Binance itself recommends it.
It provides the user with a 12 word-phrase key to keep your account secure, which you cannot recover if you lose it.
Currently, Trust Wallet is only available on Android and iOS devices. This app is also completely free to download, and you can add any coin and token to the app.
It also includes a DApp store to connect any decentralized app. It is essential to mention that the DApp is only available for Android devices, and iOS doesn't have the feature.
Steps to Create a Trust Wallet
Let's get started by creating a Trust Wallet account.
1. Downloading the Trust Wallet Application:
The first step is to download the app. Go to your device's app store and download the Trust Wallet application.
Warning: Do not download TrustWallet from third-party websites. These sites are designed to steal your funds.

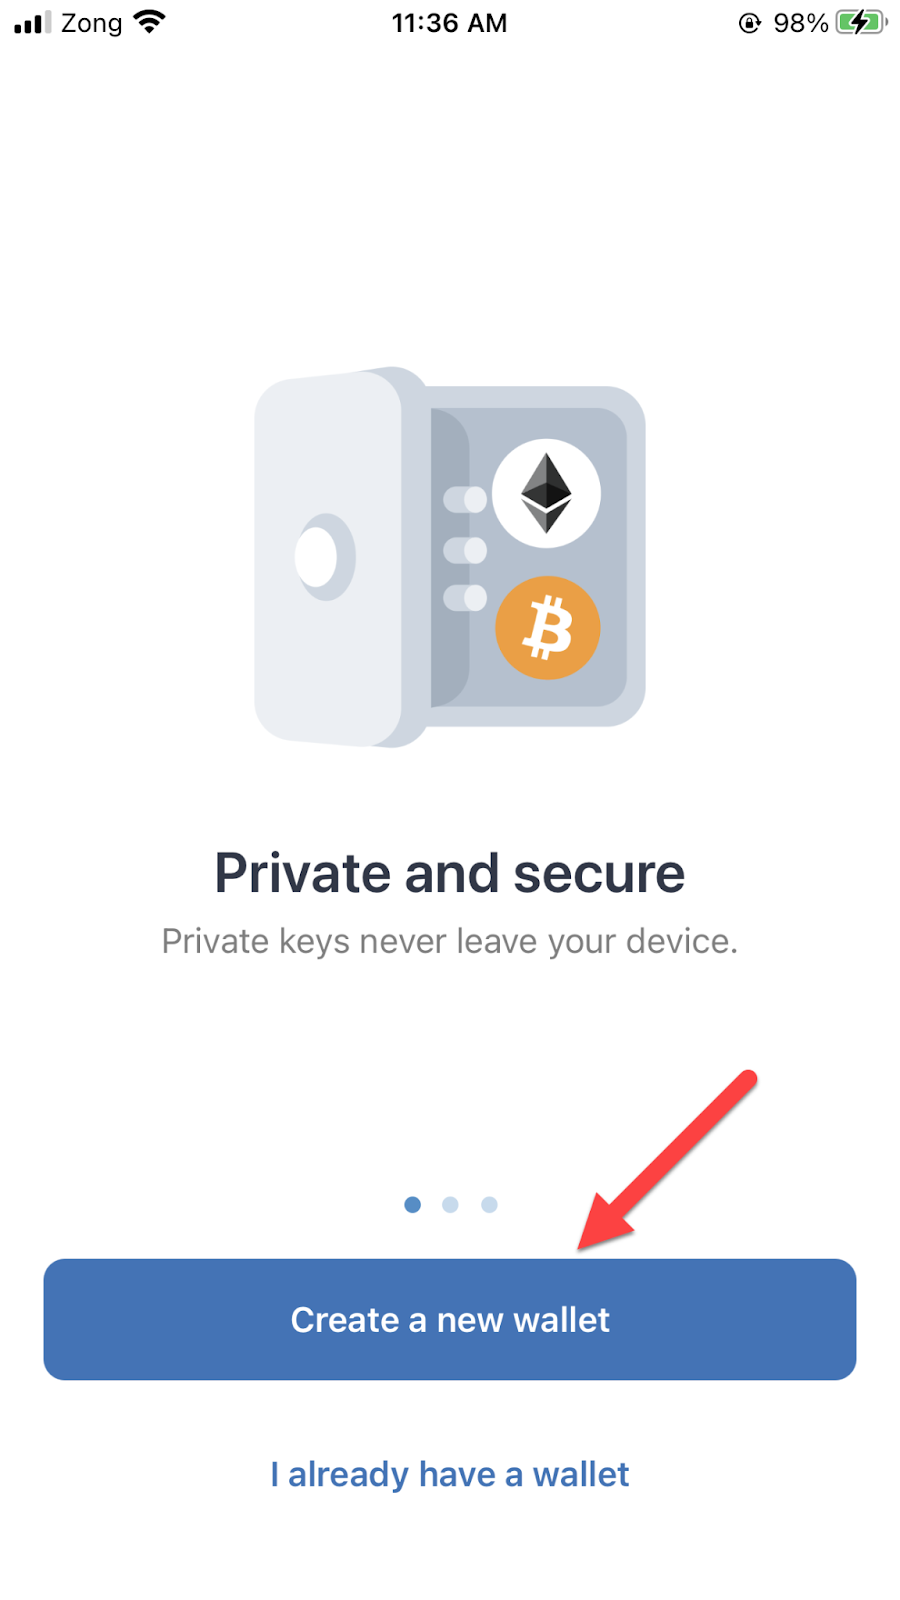
2. Setting up New Account:
Once the application has been installed on your device, click "Create a new wallet".
3. 12 Word-Phrase Recovery Key:
Next, you will see a notice informing you will receive the 12 word-phrase recovery key. Check the box and press the "Continue" button.
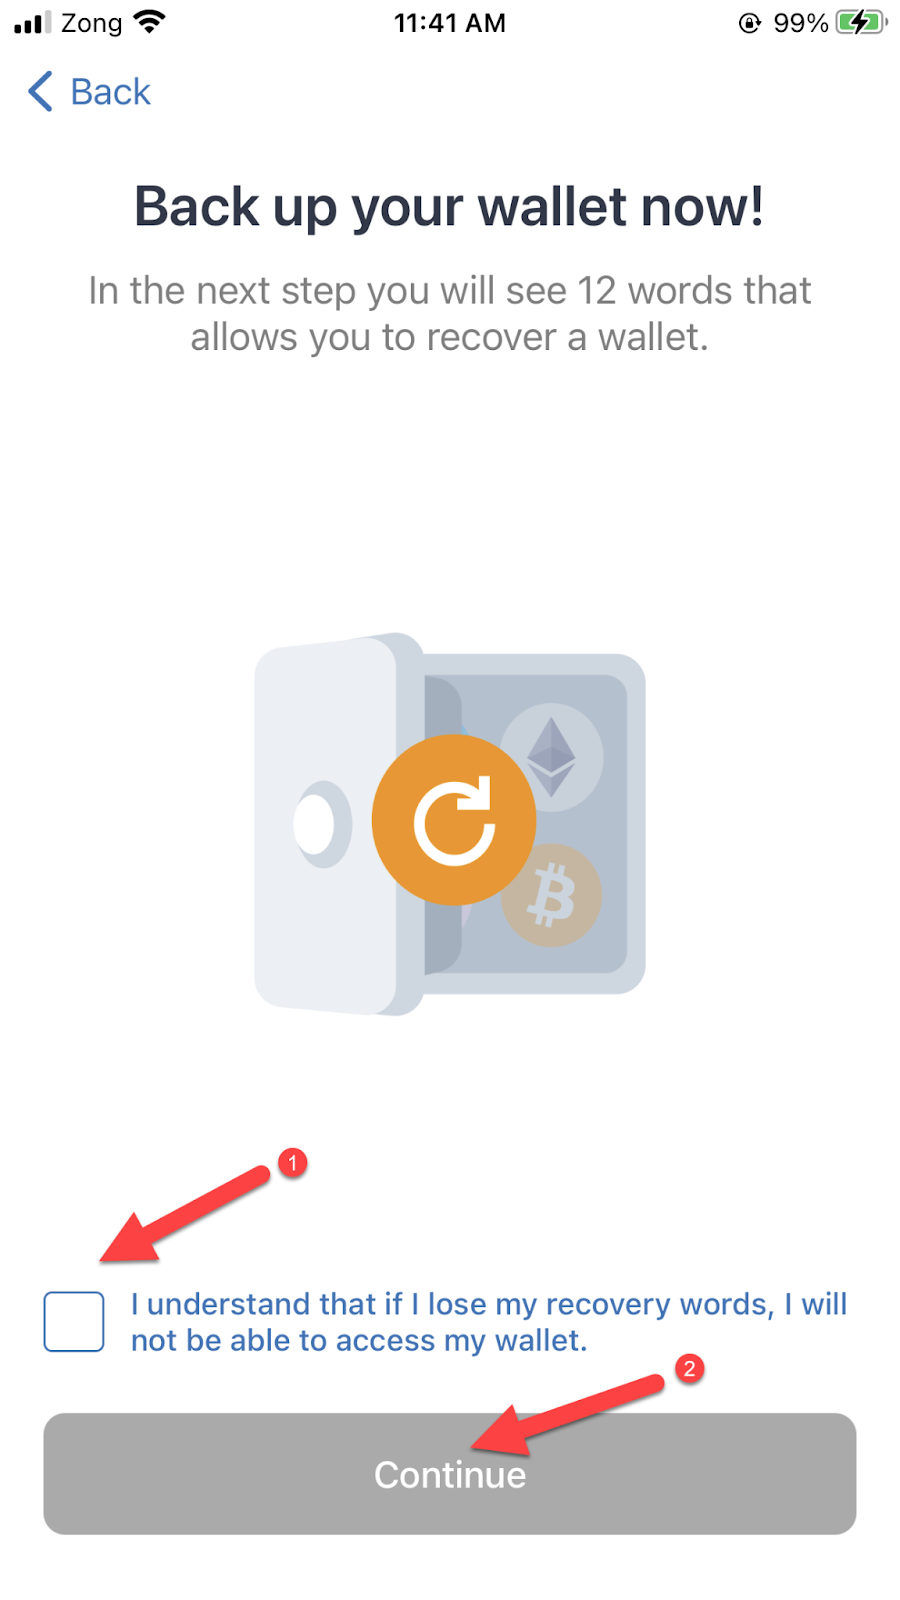
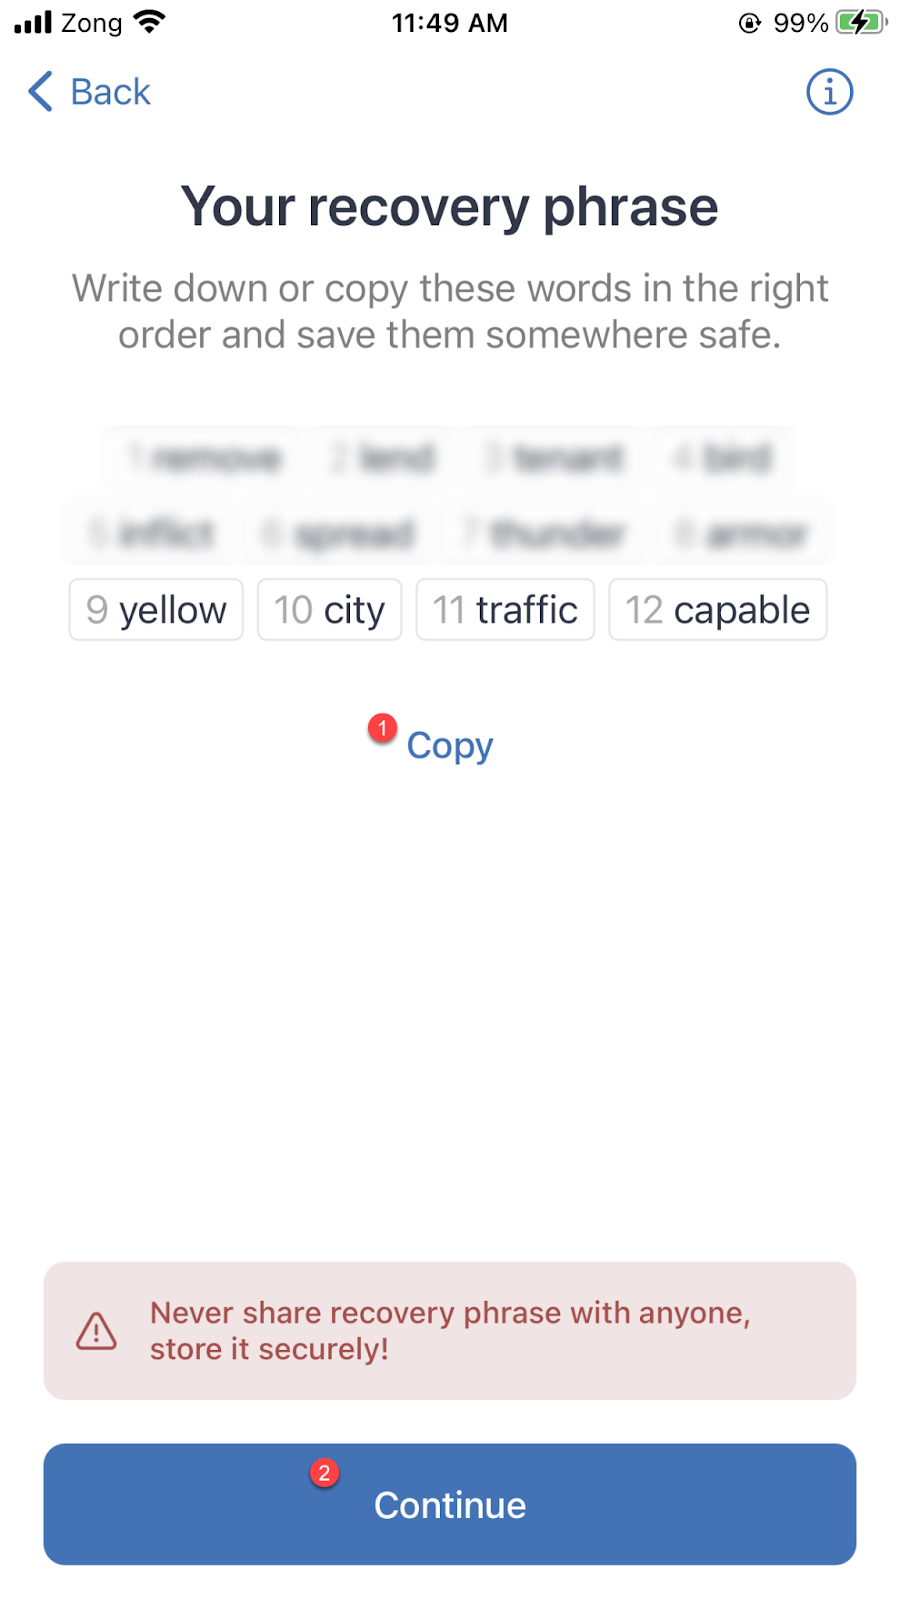
You will receive your recovery key for your account on the next page.
Warning: Keep in mind that the key is essential, and losing it will be equivalent to losing your account.
You may copy the phrase and keep it on your device or print it and place it in your property records.
4. Enter the Recovery Key:
Now tap the words to put them next to each other in the correct order. If the word phrase is not in sequential order, you will not be able to enter your wallet. After entering the key, press the "Continue" button.
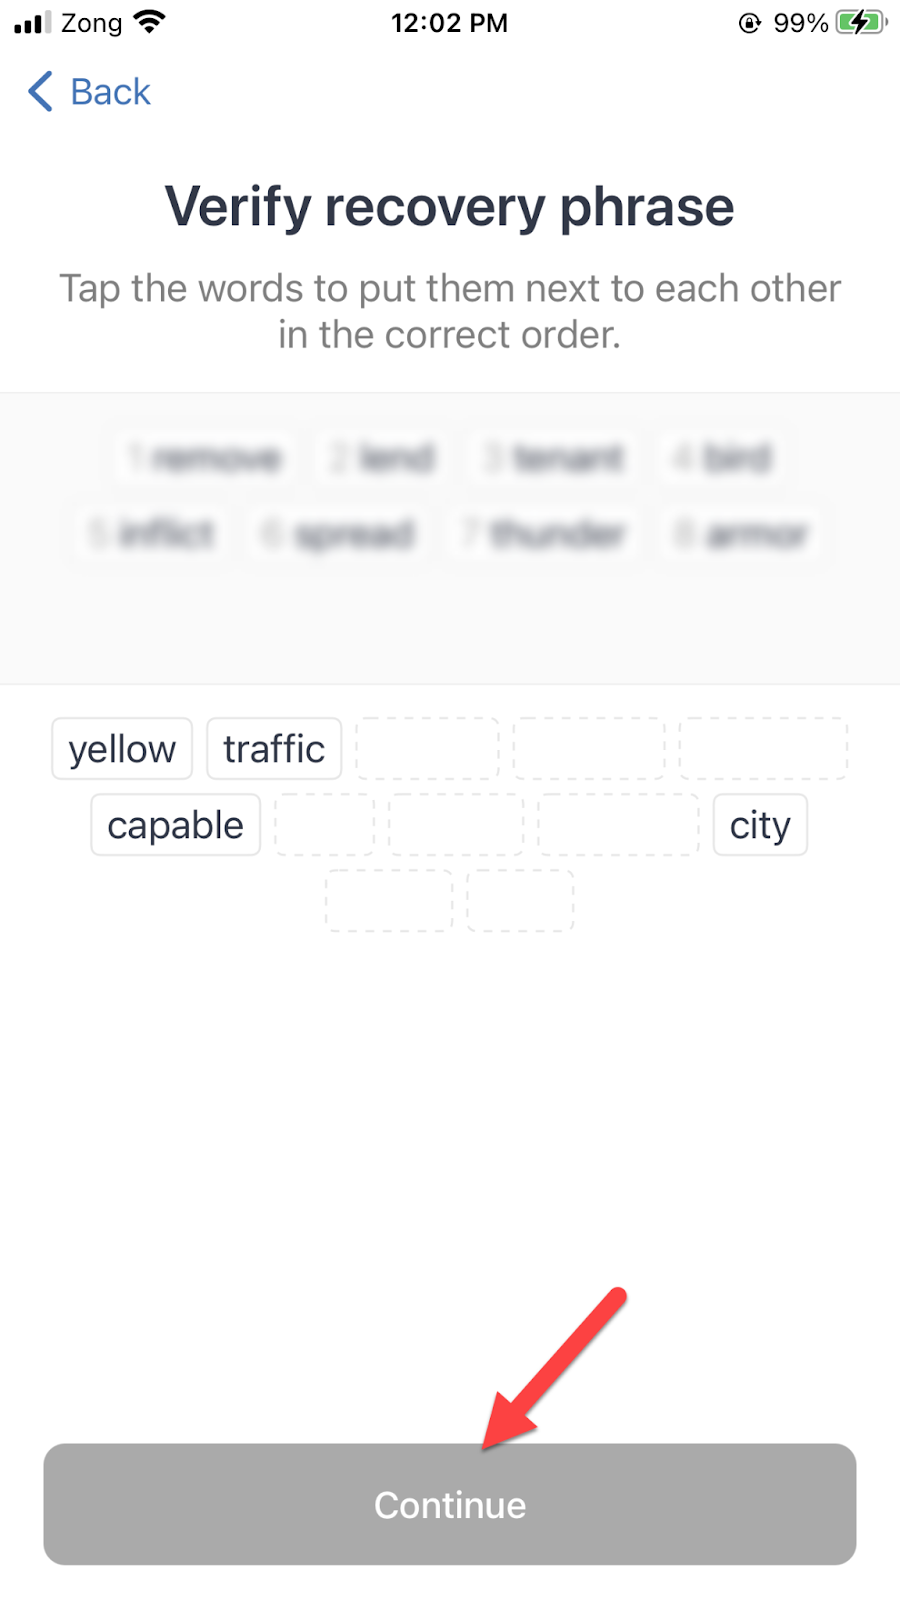
Upon entering your key successfully, you will see a message that says, "Your wallet was successfully created." After that, click on the "Ok" button or the cross icon in the top right corner of the message.
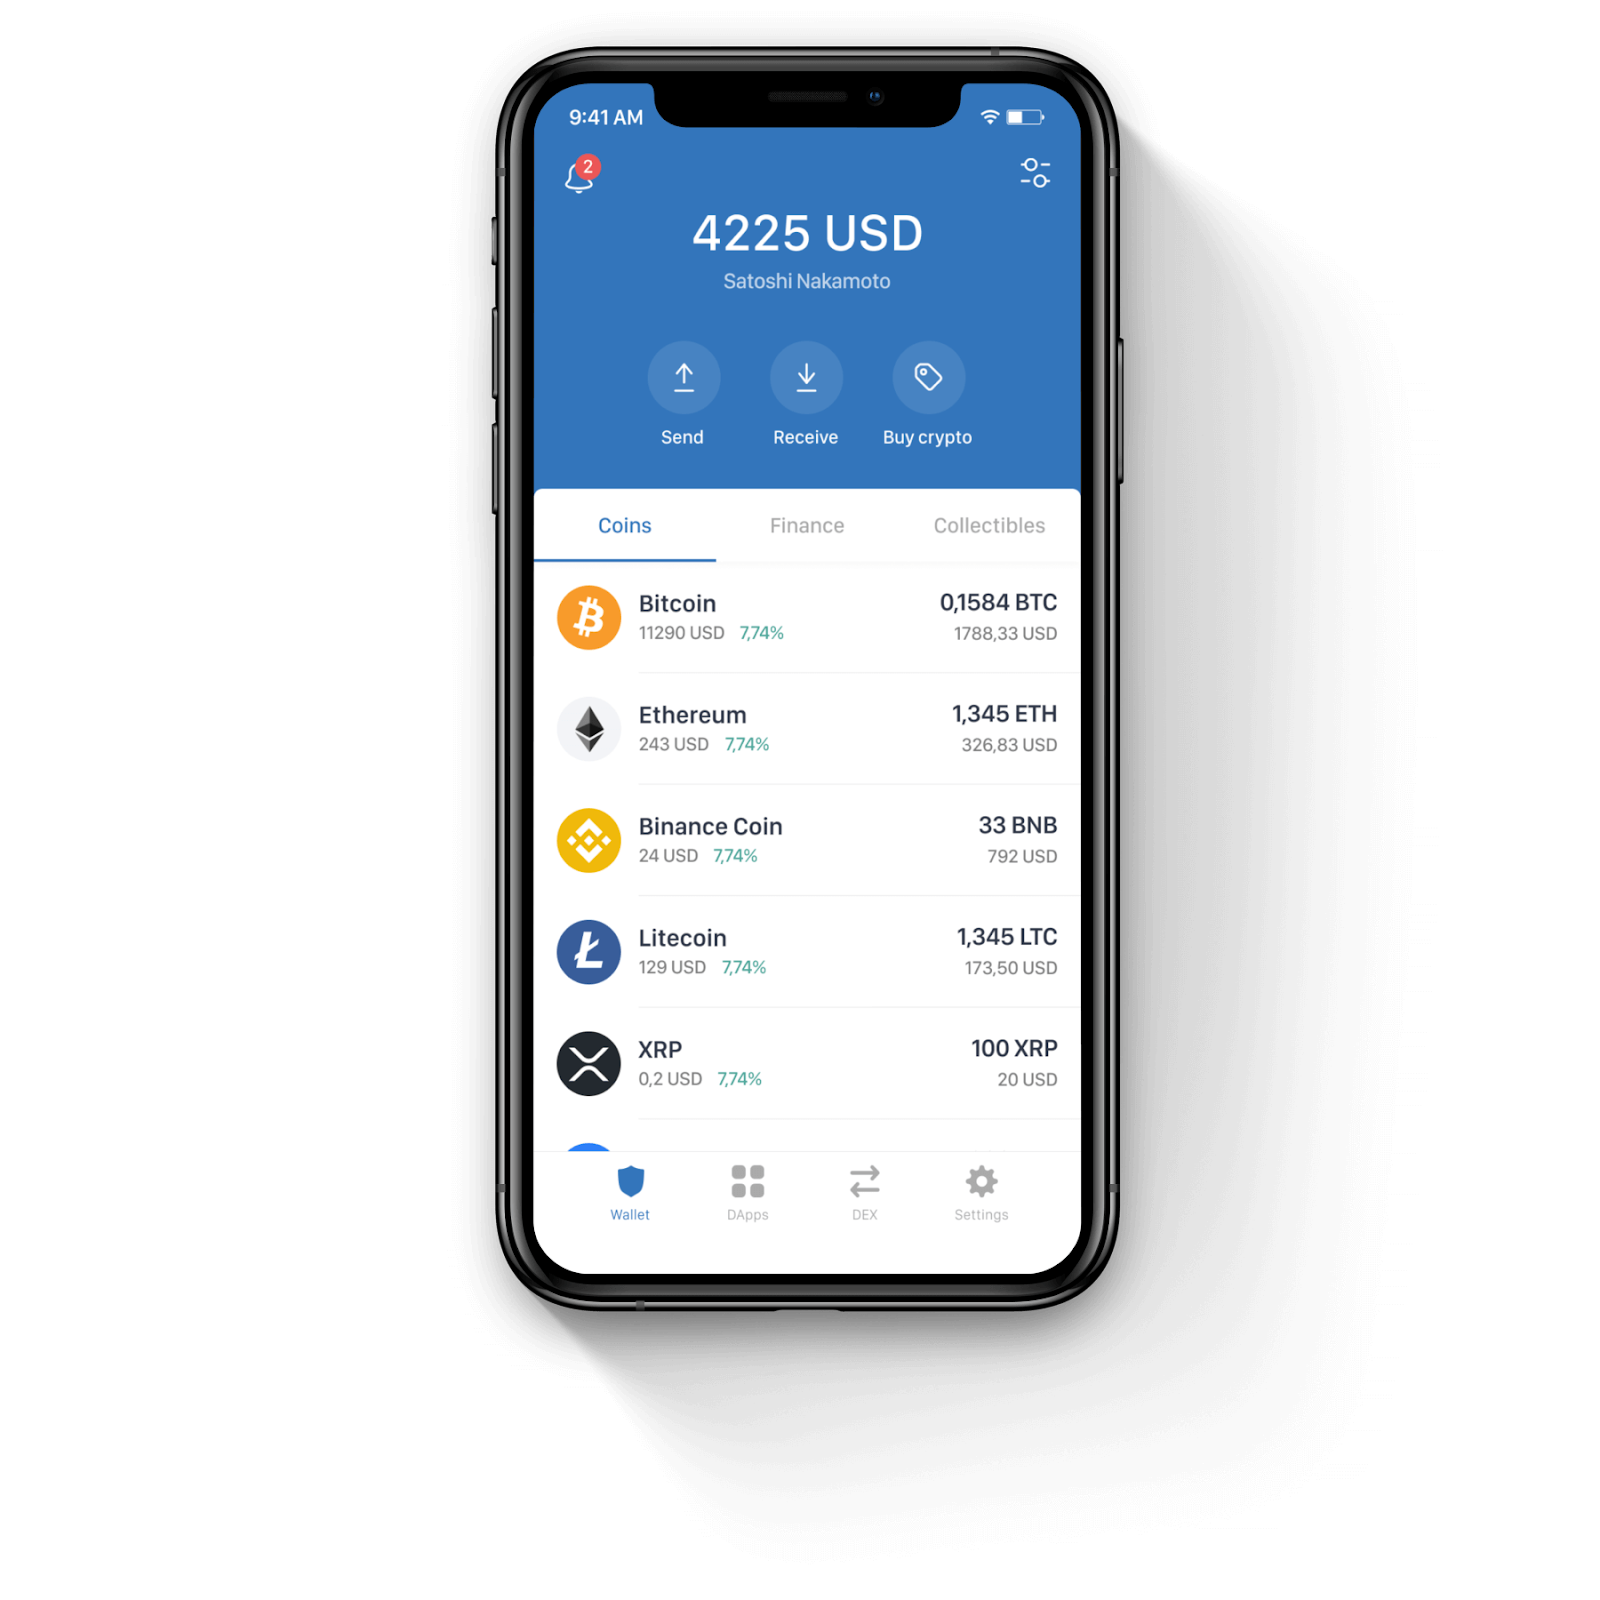
Understanding the User Interface of a Trust Wallet Account
TrustWallet is an intuitive and user-friendly application. You can send, receive, buy, or even trade coins if you want.

1. Adding a New Coin:
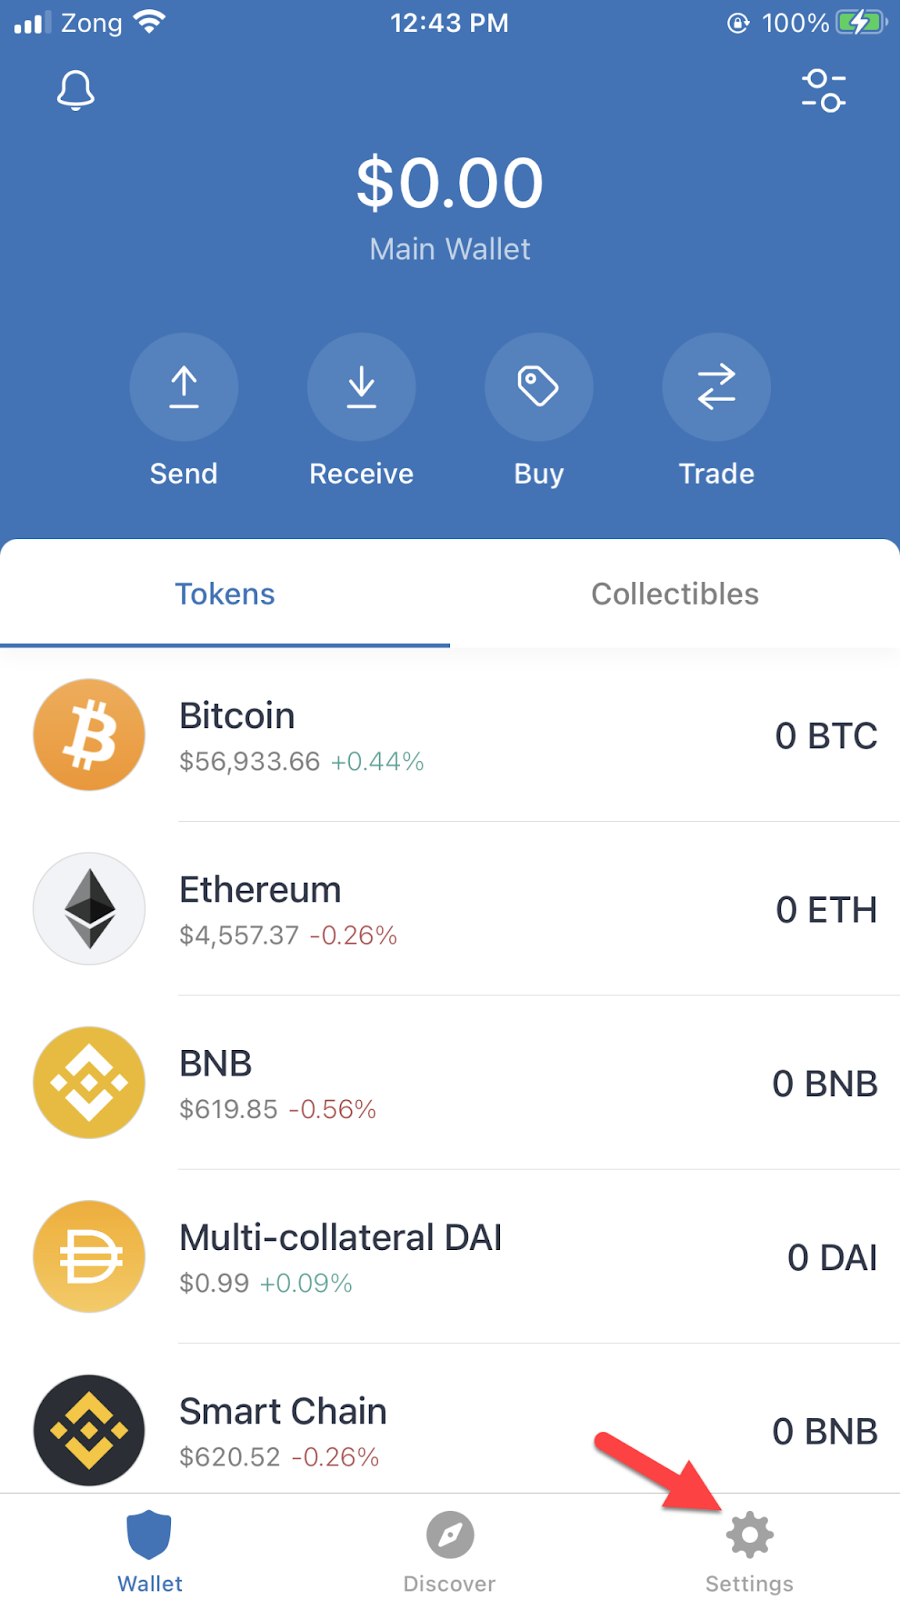
Tap the Settings icon located at the top right corner of the screen. By clicking on the icon, you can add additional coins to your wallet by clicking on the icon.
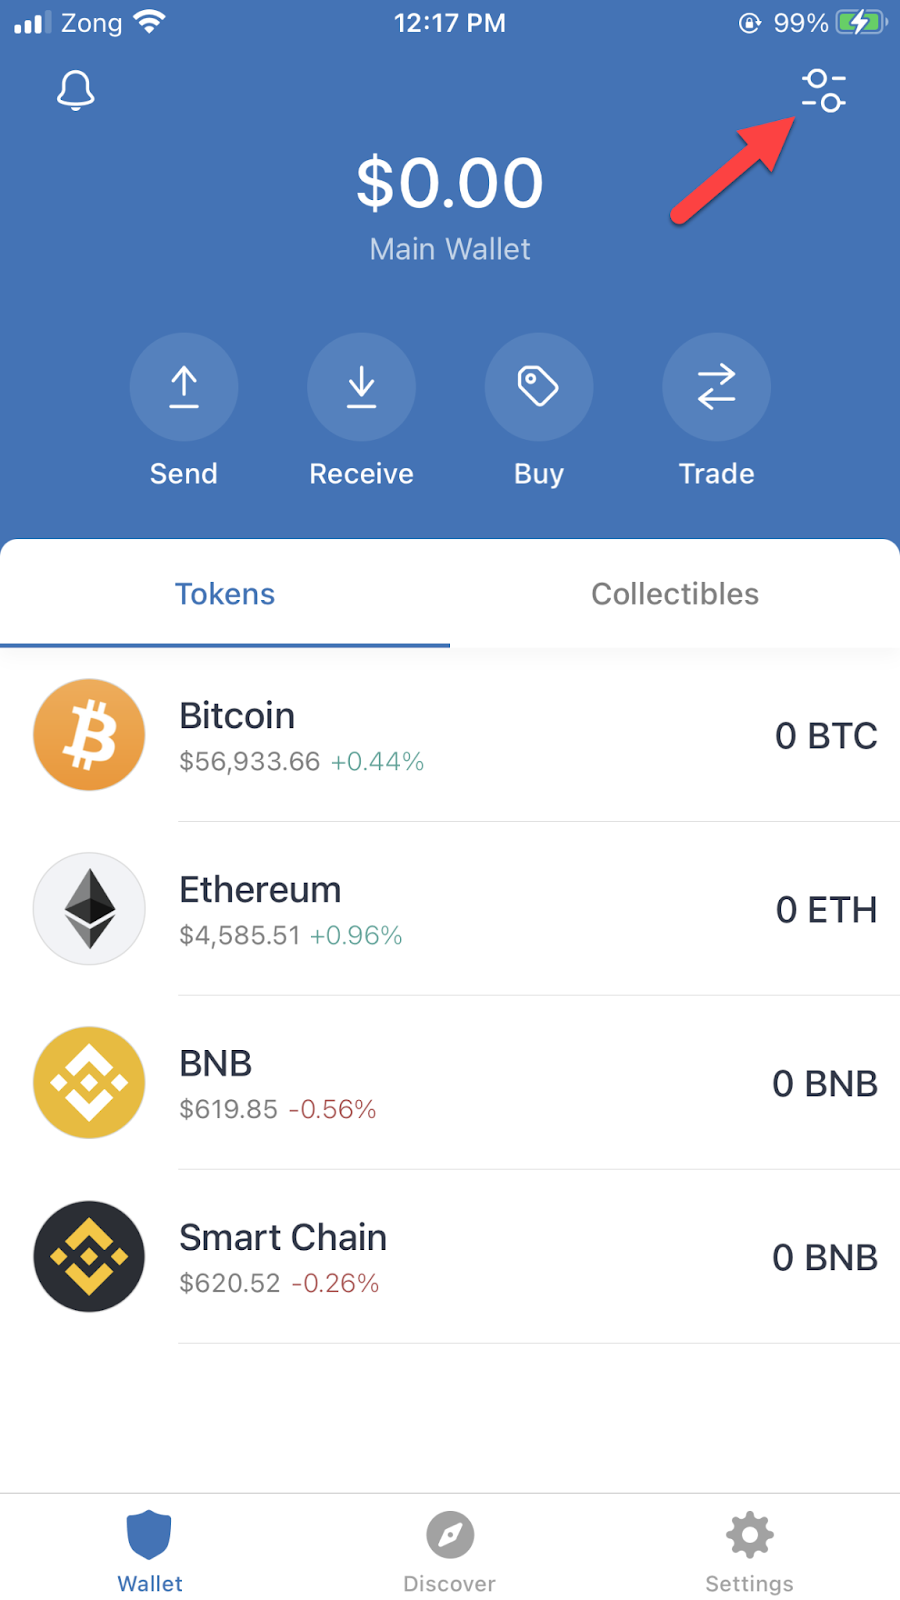
On the next screen, you will see a display with a search bar and a few coins listed. This feature allows you to search for and add any coins you desire to your wallet. Moreover, you can remove any coins you do not wish to keep.

If the token you’re seeking is not listed in Trust Wallet, proceed to the bottom of the page and click on "Add Custom Token." You may add any shit or altcoin using this method.
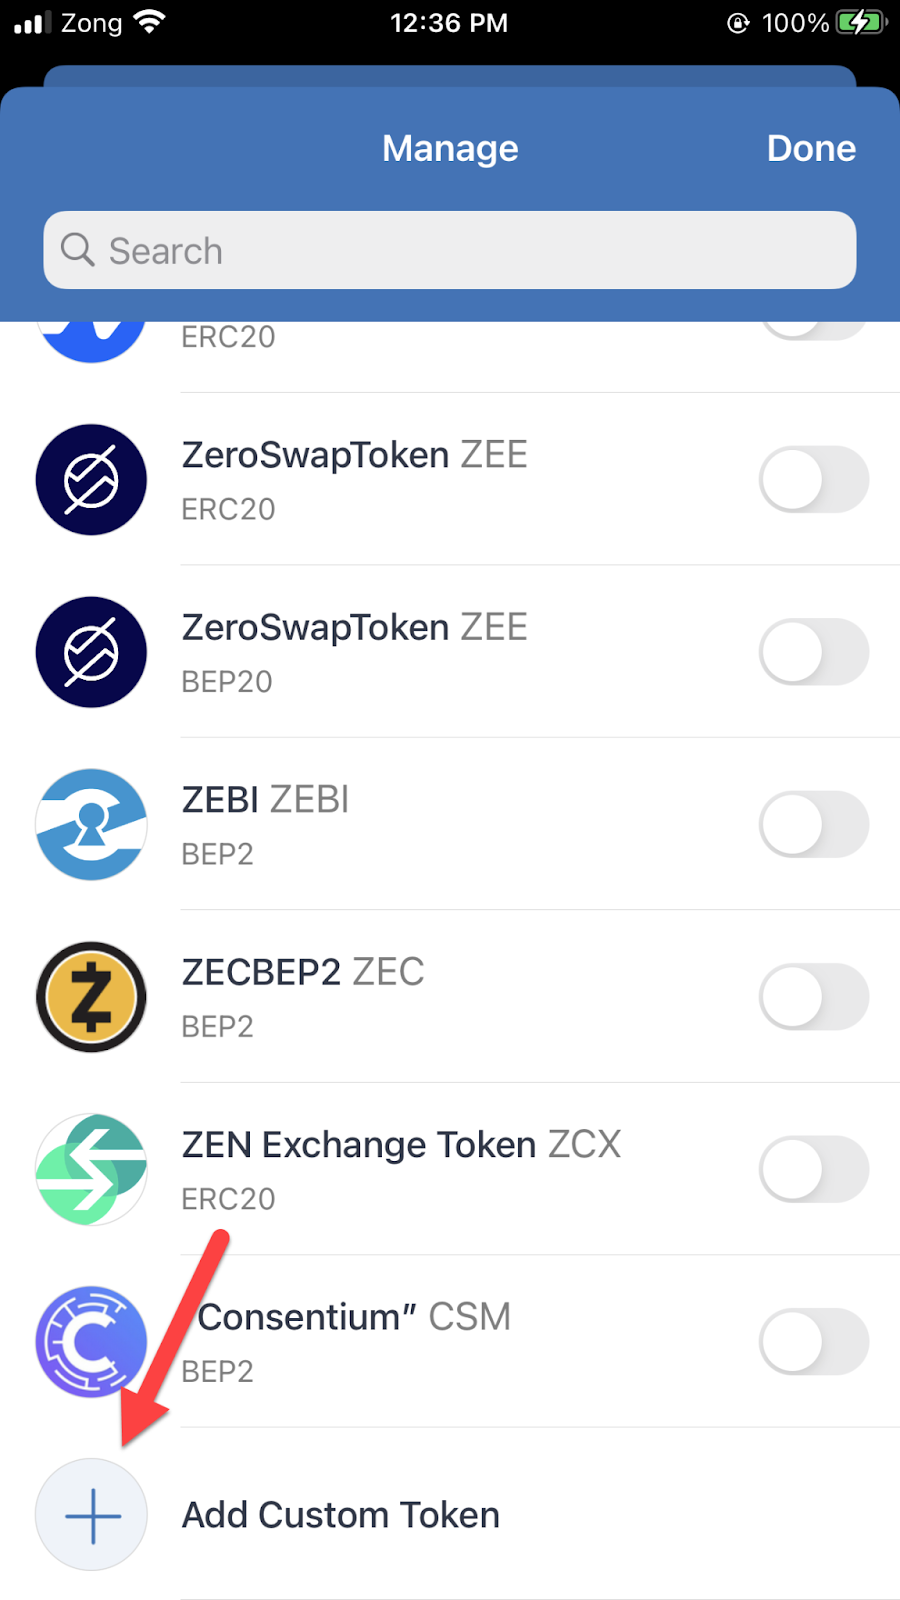
Clicking on the “Add Custom Token” button, you will be redirected to a new section where you will enter the contract address of the token you wish to add.
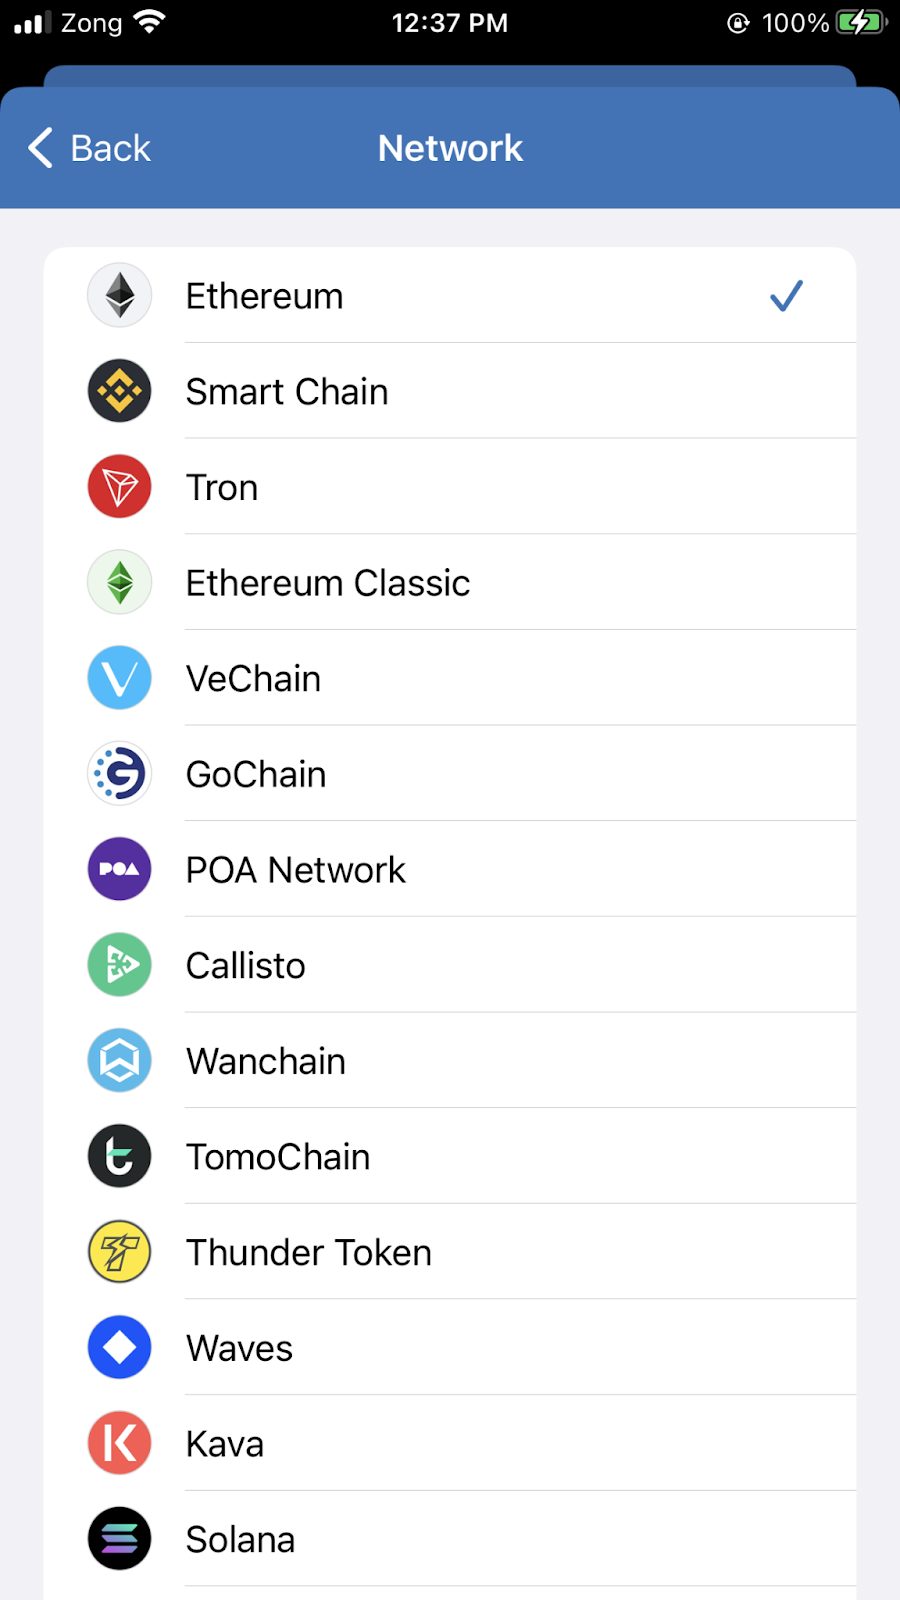
At the top, you will first select the "Network" (aka blockchain) to which the token belongs. Since different tokens may be associated with different blockchains, you need to choose the right network for your coin.
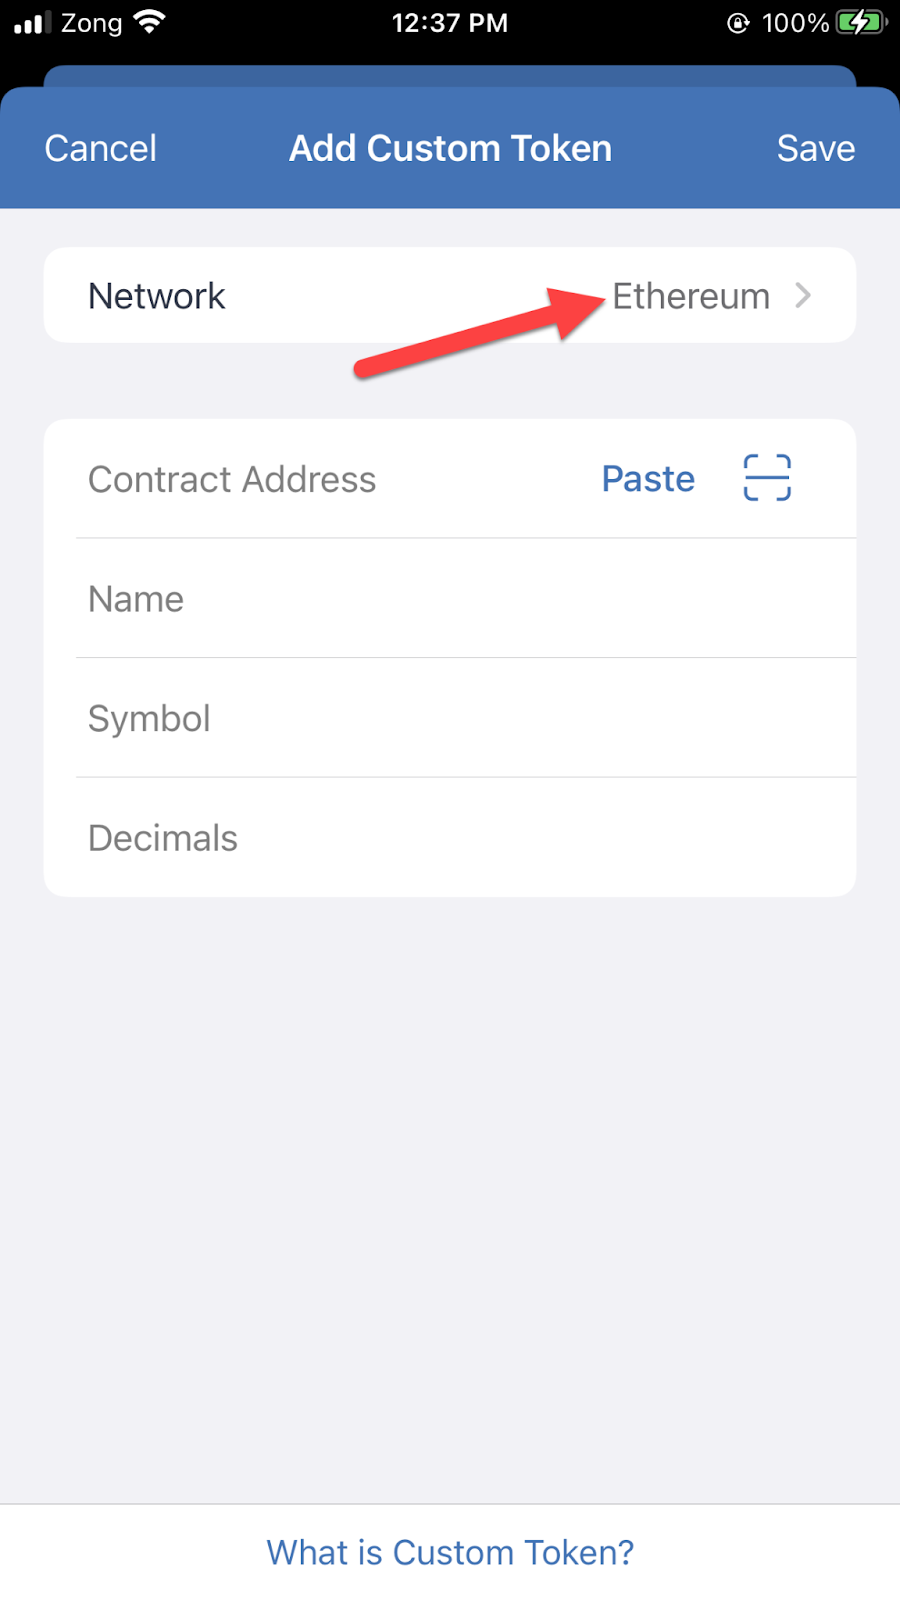
With Trust Wallet, you can choose from various blockchains or networks.
Next, you should enter the Contract Address of the token that you wish to add to your wallet.

After entering the token address, all fields will automatically be filled, as shown in the screenshots below:
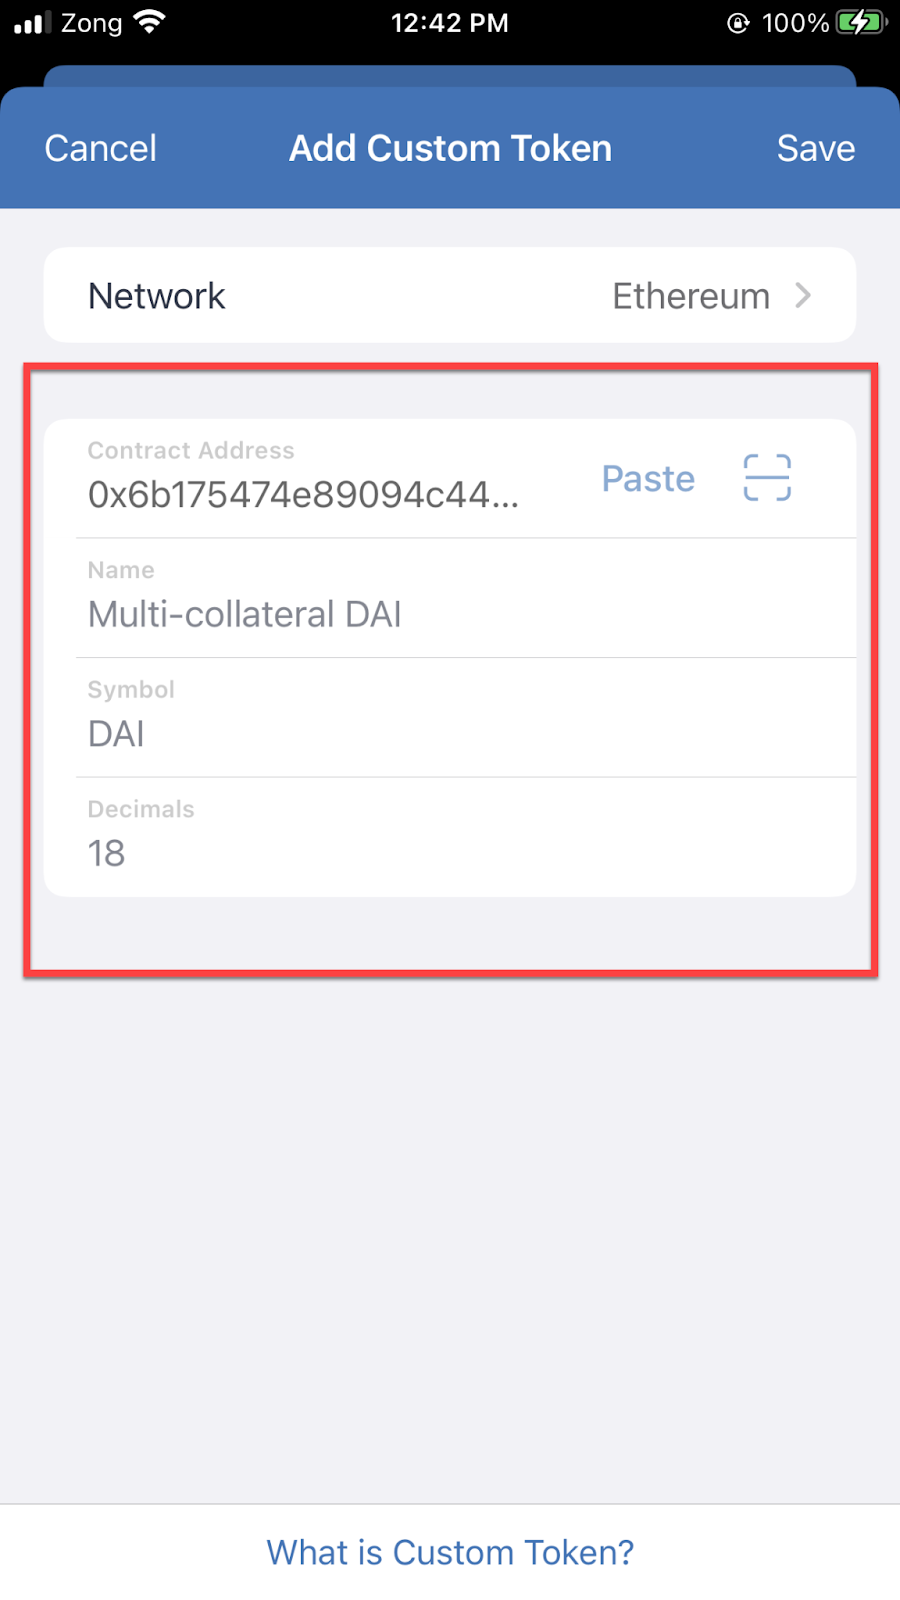
Click the "Save" button to add the token.

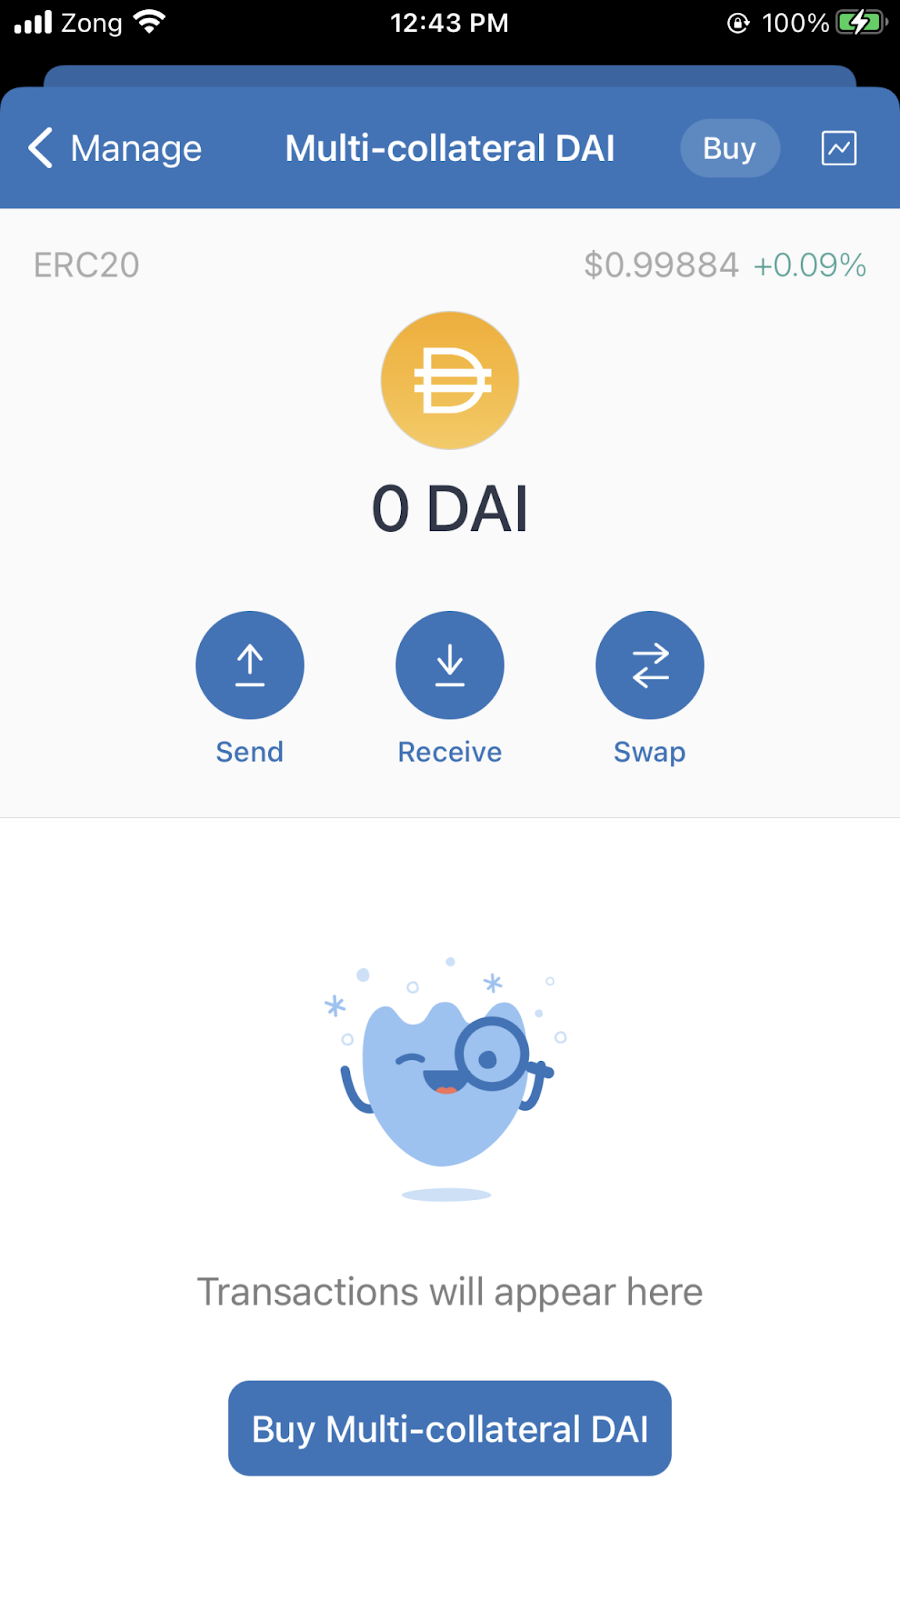
The screenshot below illustrates how the token will be added, resulting in a view similar to the one shown.
2. Finding the Recovery Key:
Click on the Settings icon located in the upper right corner of the screen.
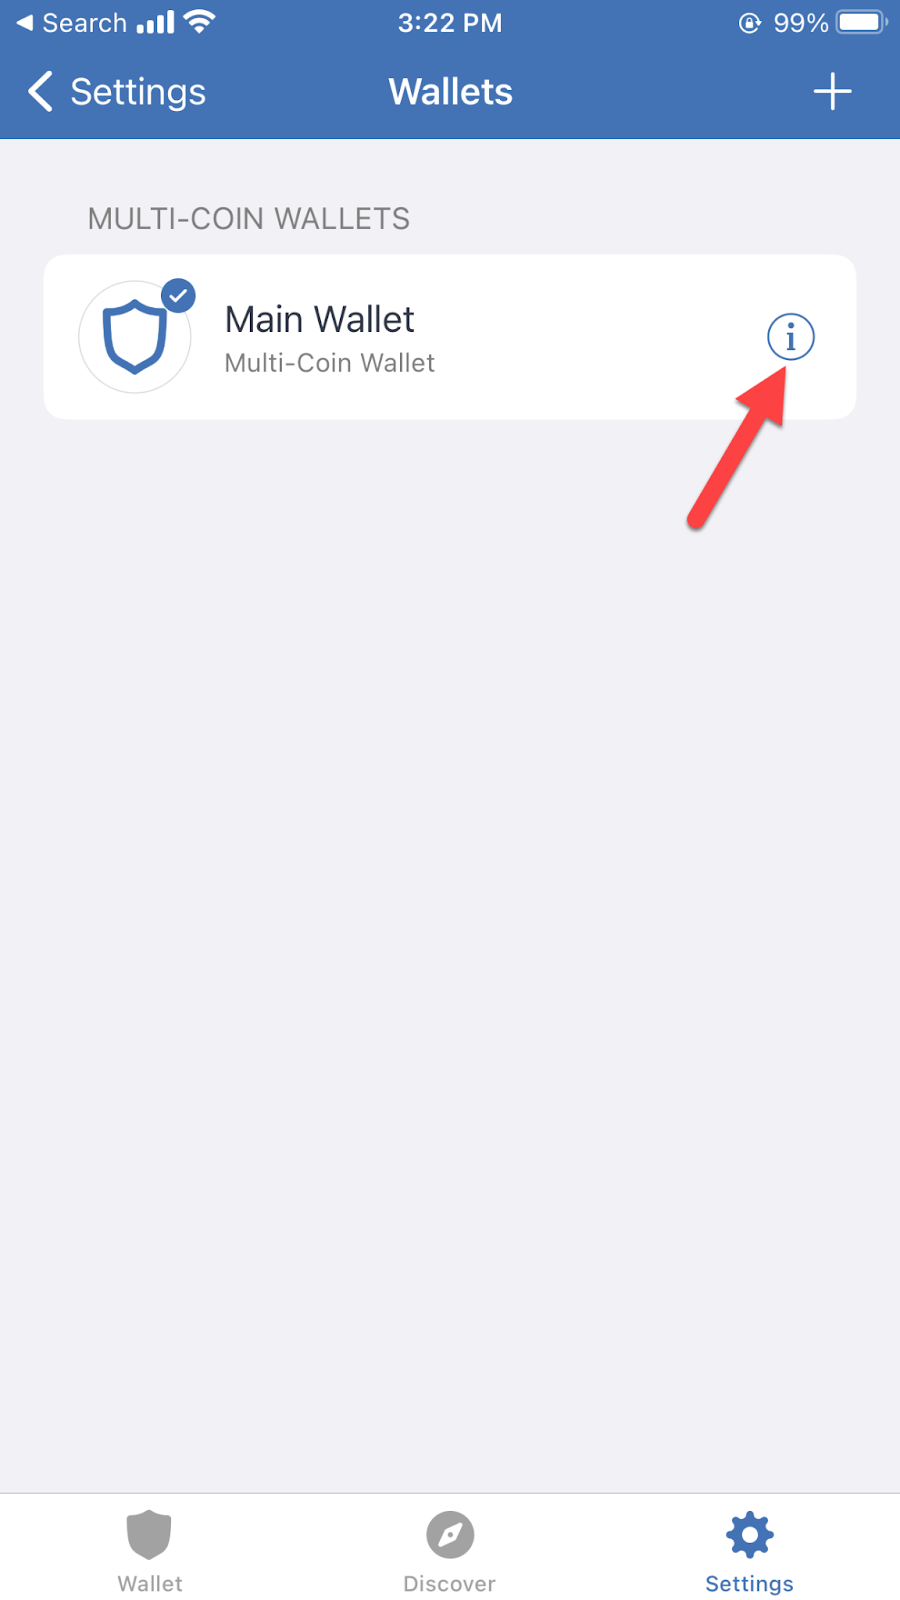
Afterward, select the "Main Wallets" option from the menu.

To continue, click on the info button shown in the screenshot below.
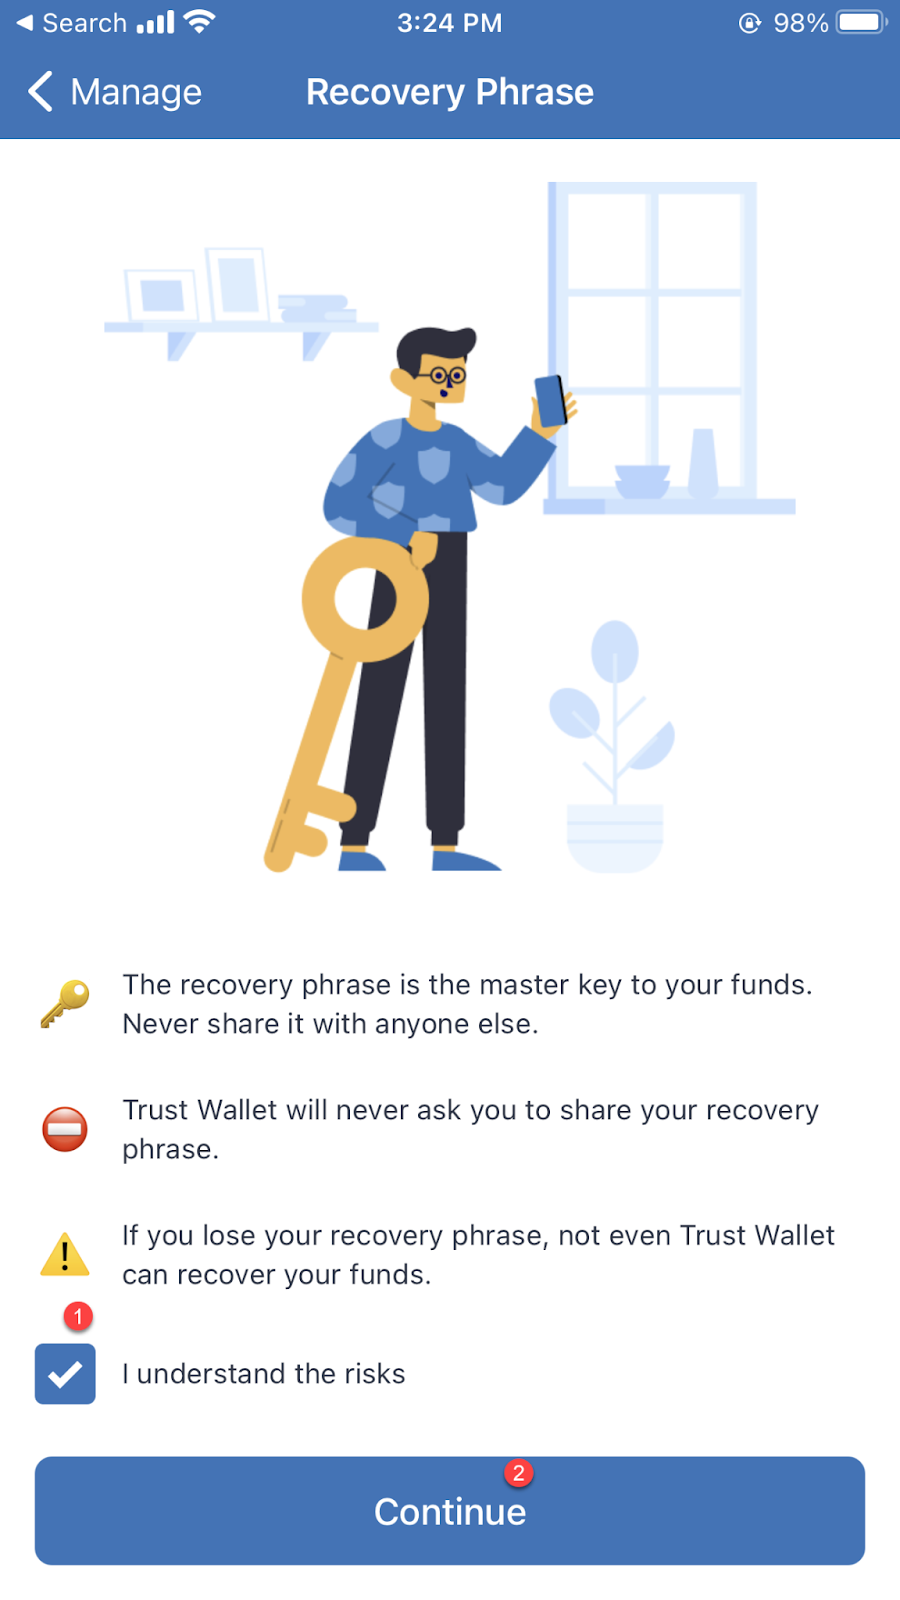
After that, click on the "Show Recovery Phrase" option.

To view your 12 word-phrase key, please select a checkbox and click the "Continue" button.
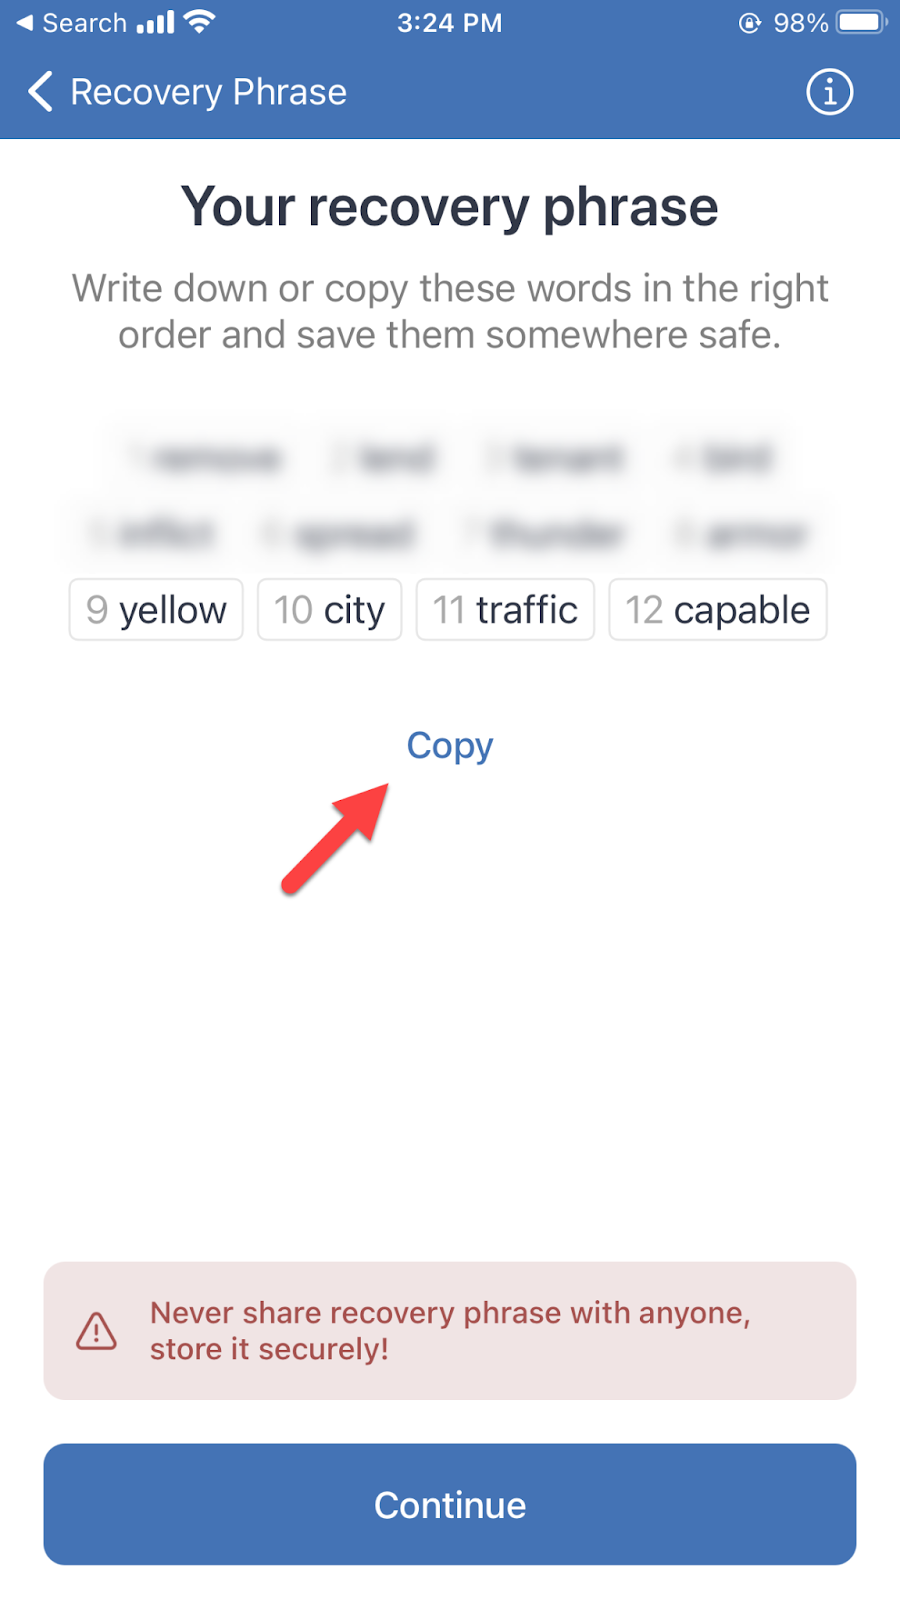
Your recovery phrase will be presented to you in the last step.
Warning: Please do not share this information with anyone, even if someone claims to be the customer support representative from TeamViewer.
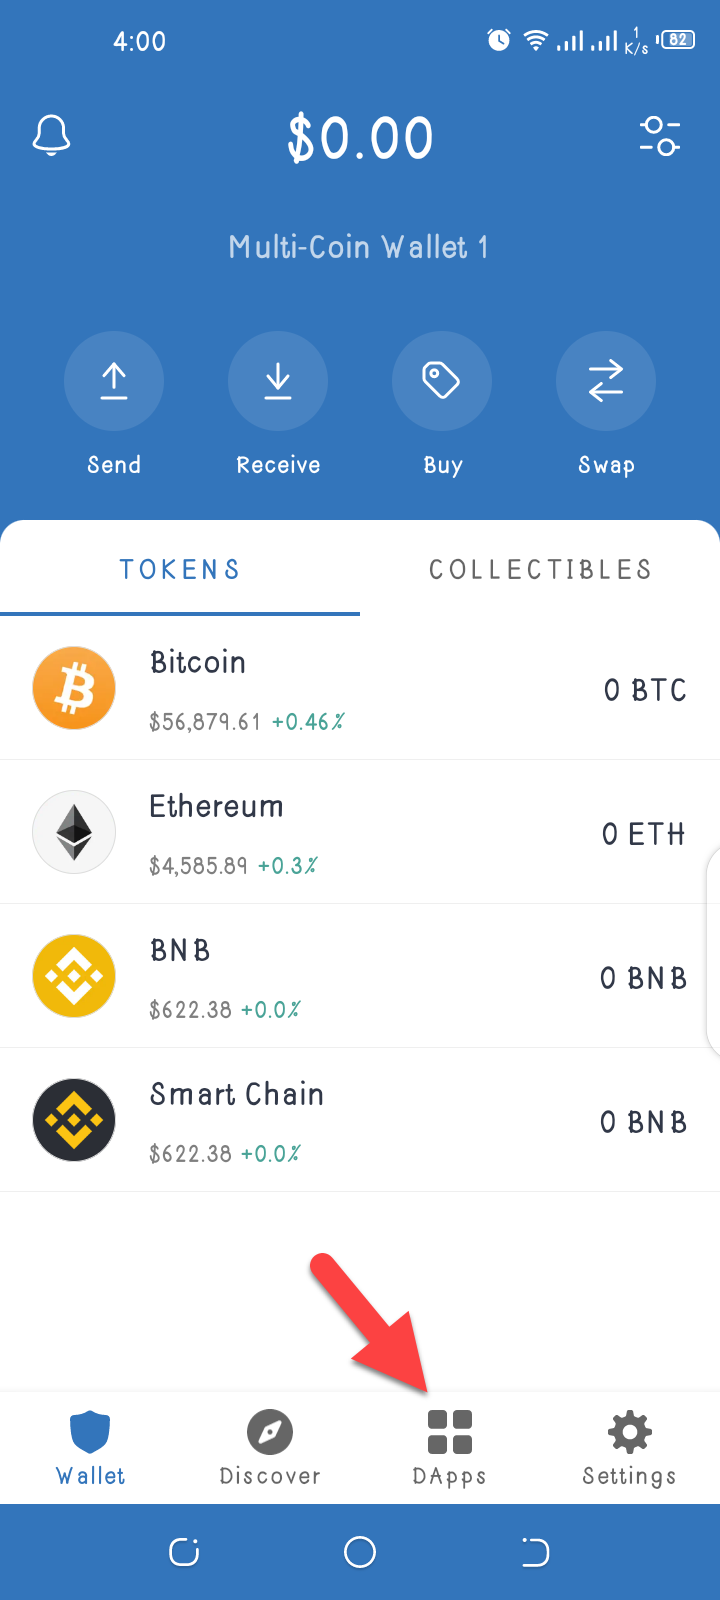
3. DApp Menu:
Trust Wallet also has an exciting feature: a DApp menu where every other decentralized app is available. Sadly, this feature is not available for iOS devices. T
Click on the "DApps" menu from the bottom right corner to access this feature.
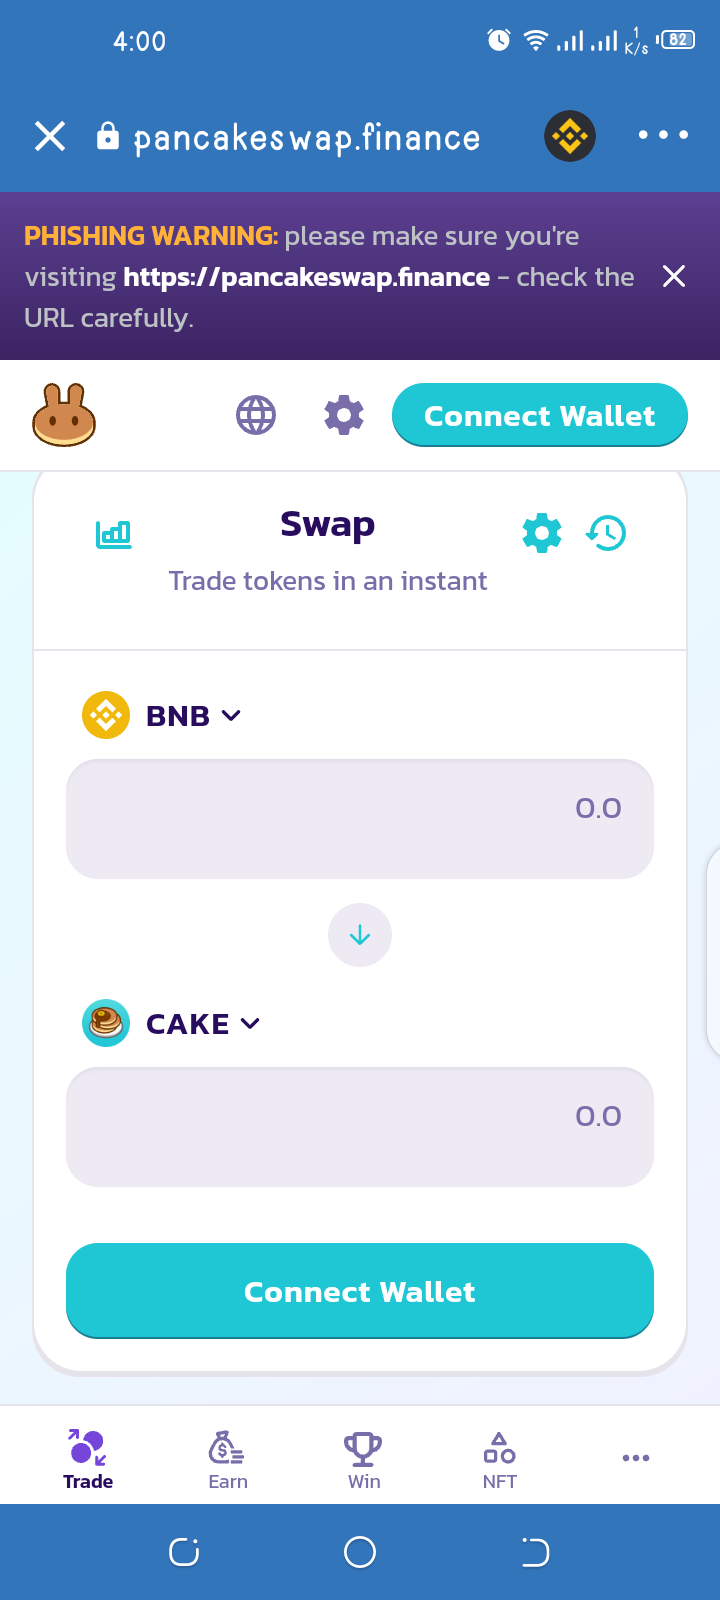
Just click on any of the DApps to use them. The most popular is PanCakeSwap which allows you to swap to any coin built on the Smart Chain.
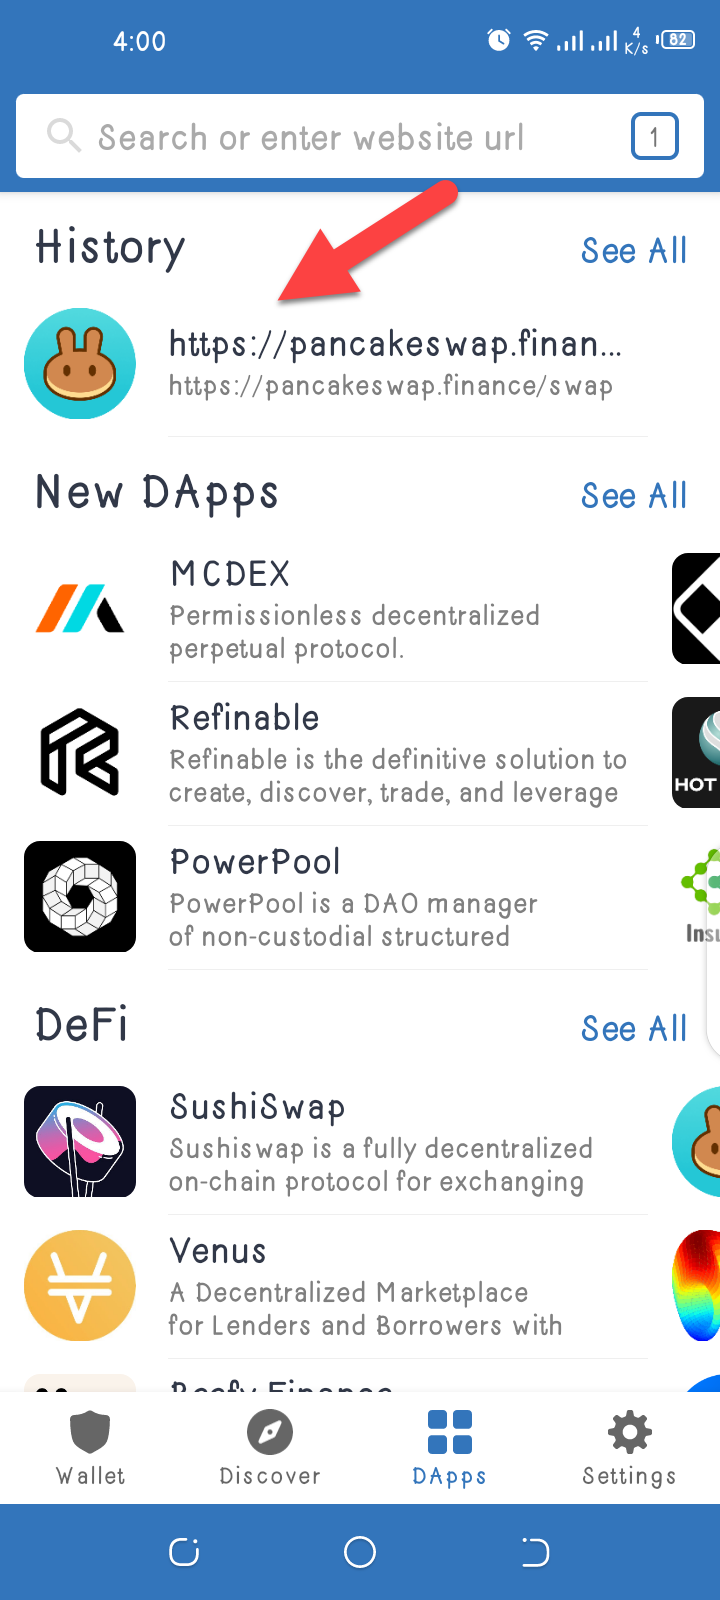
When you click on DApps, you will be directed to the application's interface. It enables you to access a wide range of decentralized applications without leaving Trust Wallet.
By the end of this article, hopefully, you have a better understanding of how to create a wallet on Trust Wallet.😊
